Everytime I was talking to people about the helmet there came the question when it would be possible to buy it. This was never my approach. It wasn´t thought as a product, but as a experiment. Finally I decided to share the instructions with everybody who want`s to develop his own Decelerator Helmet.
It´s actually not too hard to build the basic version using everyday tools (like the VLC player, VVVV, a Laptop/Netbook, a Webcam and a bicycle helmet) and it will just take one or two hours.
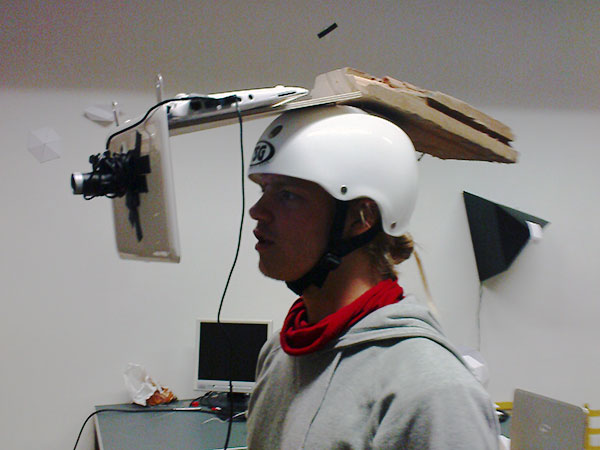
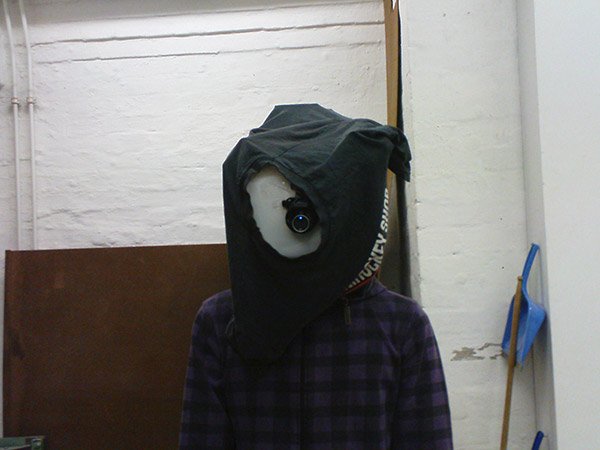
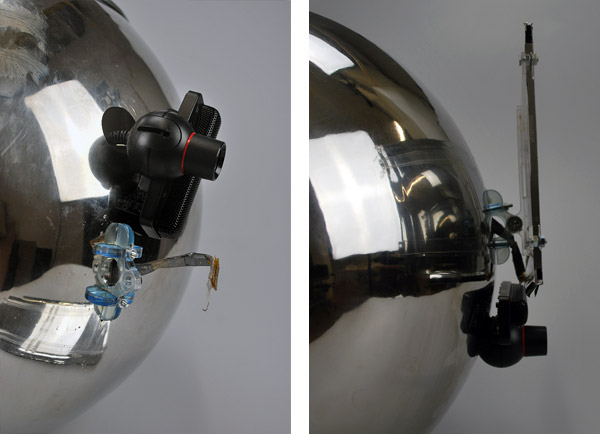
You need to tinker a bit, it will probably look as improvised as this one, but it works!
I´m also showing detailed instructions and plans how to build the exact version I constructed (with some not everyday items like video glasses and a garden decoration sphere). If you don´t want to buy all this stuff or have some different hardware already existing this could still be helpful.
I´m very curious, so if you have any questions or annotations please feel free to post a comment at the end of the site.
General functionality
Most of the software behind the slowing down of the images is done by the simple combination of two functions of the VLC player: the possibiliy to slow down videoplayback and the option to define a camera as video input.
A little VVVV patch just takes the input of the remote control (clicks and rotation of the mousewheel) and sends it as a virtual keypress to the VLC player. Here they are received as shortcuts connected to actions, just if you would press a key on the Netbook keyboard.
It´s surely not the most elegant, but best working and straight forward solution. Now you can detach the netbook somehow at your head (you don´t even have to), look at the screen and control the video speed. Everything else on top is than basically up to you, the deepness of your interest and your finances.
Material
What you need for the basic functionality:
- VLC player (with changed keyboard shortcuts)
- VVVV (with the control patch)
- A Windows laptop/notebook
- A webcam
- A mouse
- A bicycle helmet
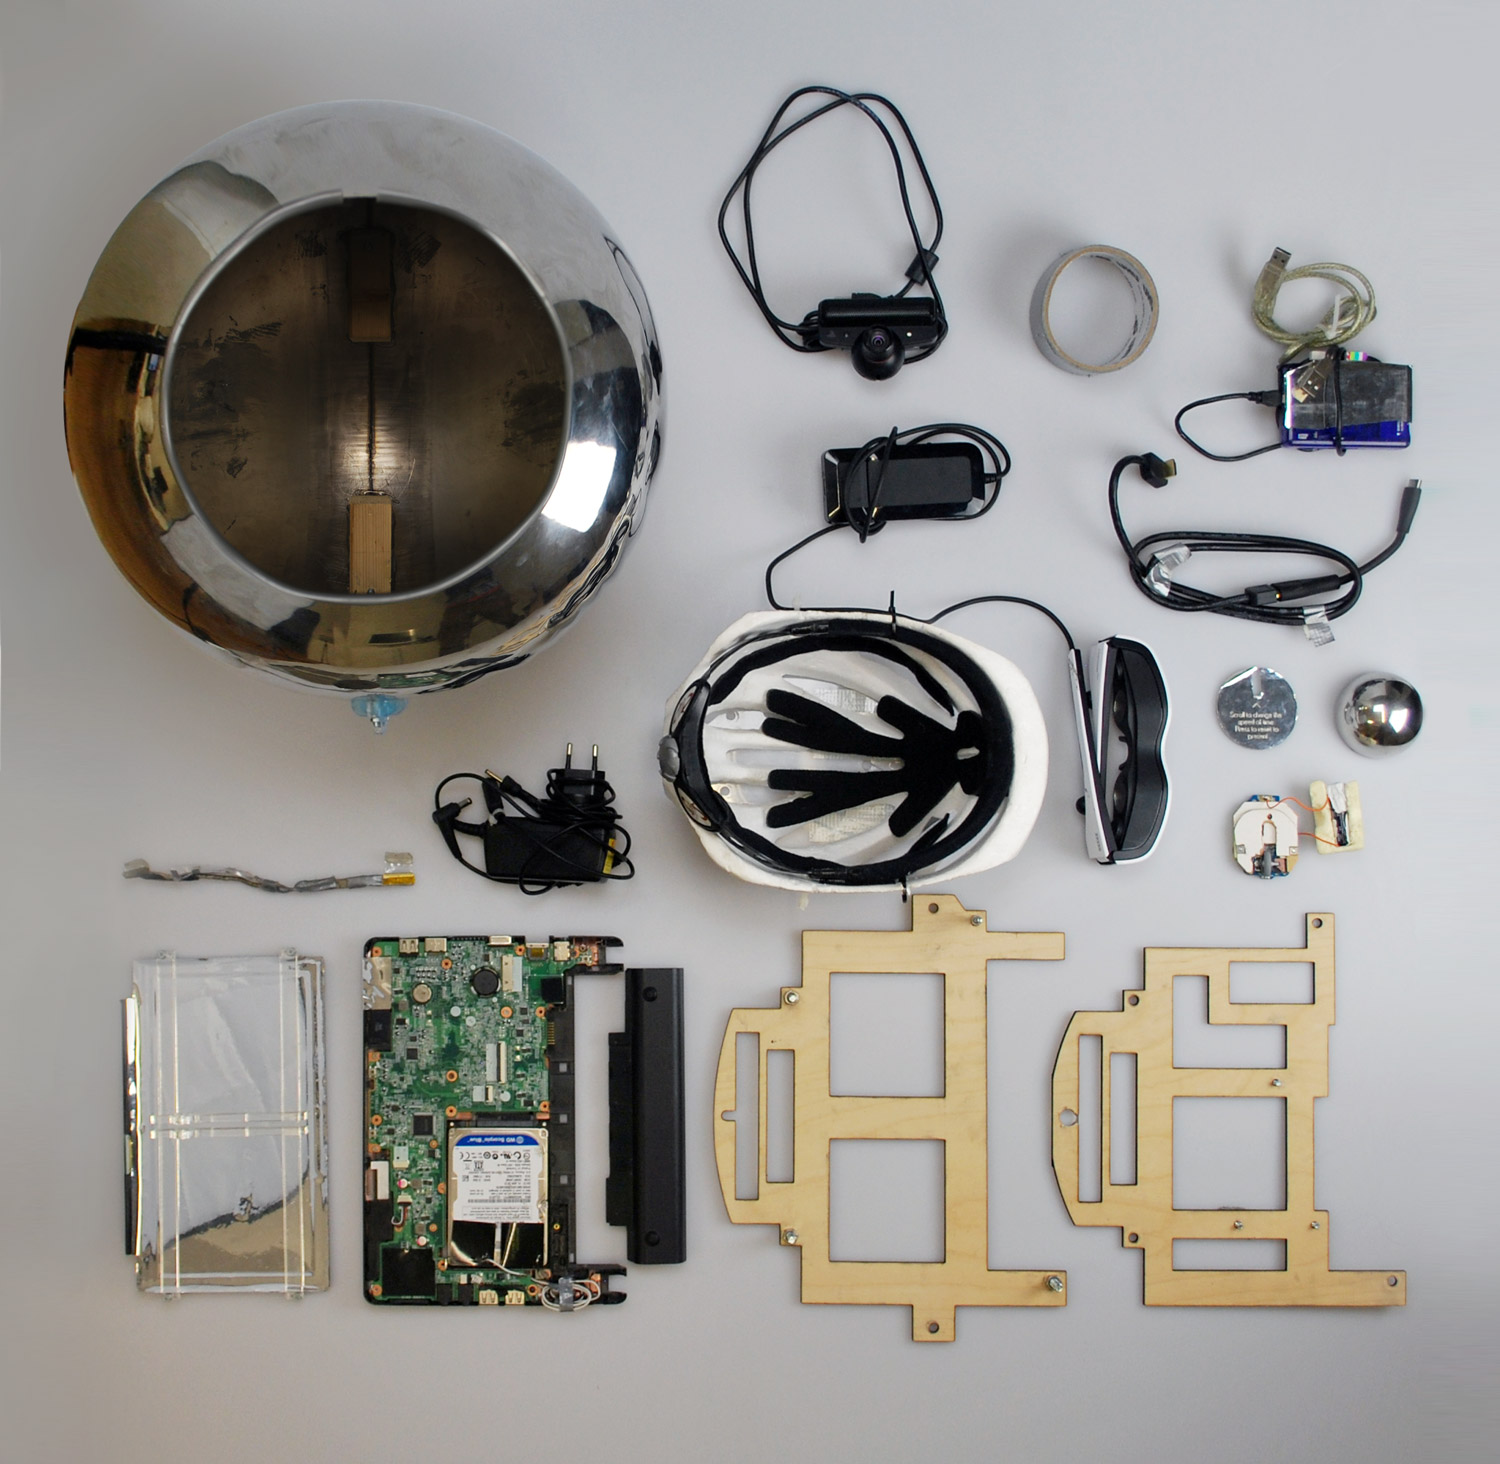
What you would (additionally) need for the exact replica:
- Zeiss Cinemizer Videoglasses (or any other, like the Occulus Rift)
- An Acer Aspire One D270 Netbook
- A garden decoration aluminium sphere
- A USB hub
- Another mouse
- The mounting
- 16 M2 10mm screws, 8 M4 15mm screws + fitting nuts
- Some cables (HDMI-to-MiniHDMI, USB-to-MiniUSB, Powercable of the Netbook)
- A lot of Duct Tape, hot glue and zipties!
Basic Versions
VLC player
Download and install the most recent version of the free and open-source VLC media player.
Now you need to change the keyboard shortcuts to make them fit with the keypresses send from the VVVV patch later on. Here you can download a config file that should include the shortcuts to replace the default ones in the „vlcrc“ folder. You can find it here:
- Windows 95/98/ME: C:\Windows\Application Data\vlc
- Windows 2000/XP: C:\Documents and Settings\%username%\Application Data\vlc
- Windows Vista/7: C:\Users\%username%\Application Data\vlc
If this is somehow not working you can also manually change the keyboard shortcuts. Open the VLC player, click on „Tools/Preferences“, than at the left on „Hotkeys“ and change the actions as following:
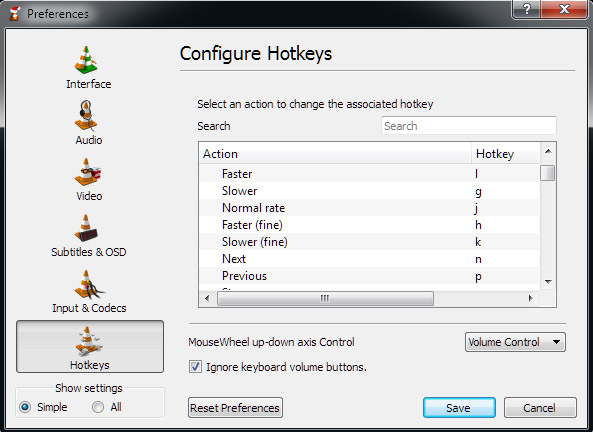
Before the changes becom active you need to restart VLC player.
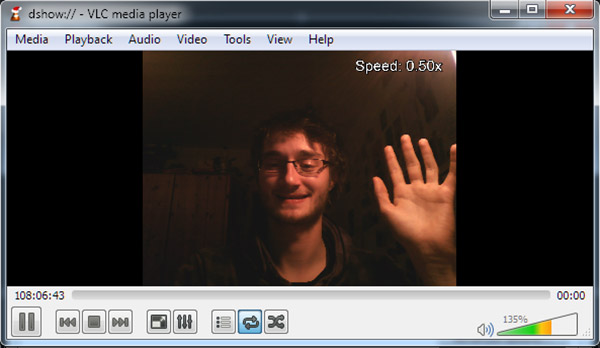
In the next step you should define your webcam as video input. Click on „Media/Open Capture Device“ and search for your camera in the Video device list.

Set the Audio Device to „None“ (to avoid feedback) and activate „Show more options“. Change the caching to arround 30ms and than click on play. Depending on the webcam you are using you eventualls need to adjust the videosettings to accomplish a smooth playback. You can activate the „Device properties“ under „Advanced options“ to see more options (depending on your hardware) before the video starts playing.
If everything is okay you should now see the video of the webcam and be able to change the speed of the playback by clicking on the G, H, J, K or L key.
VVVV
In the next step we are going to make the remote control of the speed via the mousewheel possible.
Download and install the most recent version of the visual programming environment VVVV. Then download the Decelerator Patch here and open it. You don´t have to understand anything about VVVV, just make sure the target box is targeting to the VLC player (which needs to be running of course).
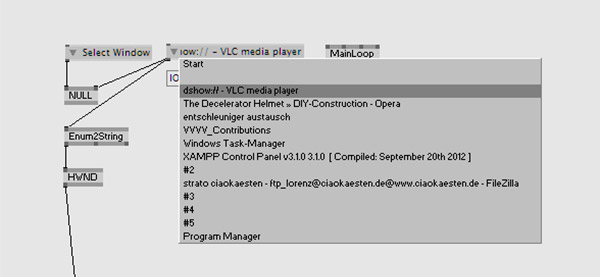
If you now scroll the mousewheel down the keypress J is send to the VLC player and you should see the actual speed of the video playback changing. To get rid of the VVVV window (not the renderer) drag it to the side of the screen until you barely can see it anymore.
And Voilá: This is everything you will need from the software side to play arround with the concept of deceleration. If you want to get even fancier follow the steps underneath or build your own helmet using your existing hardware!
Construction
Well… Now that´s pretty much up to you and your hardware (but you can take the photos as inspiration). It is quite easy to attach something to a bicycle helmet by screwing it through the holes or the styrofoam. Make a wooden construction to place the Netbook on top of the helmet with the display facing to your face. Attach the webcam (eventually with the good old duct tape) to the front of it. Maybe you will need a counterweight on the backside of your head.
Now check if everything is secured, run the software part as described before and walk arround in your neighborhood in slow motion, scaring all the little children…
Advanced version
Netbook
In my final prototype I used a Acer Aspire One D270 Netbook and all the plans and measurements and fitted to the size and layout of this model. So if you want to use a different Netbook you probably need to adjust some elements.
First I got rid of the outer hull of the Netbook to reduce some weight. Also I removed the display which we are going to use at the outside of the helmet later on.

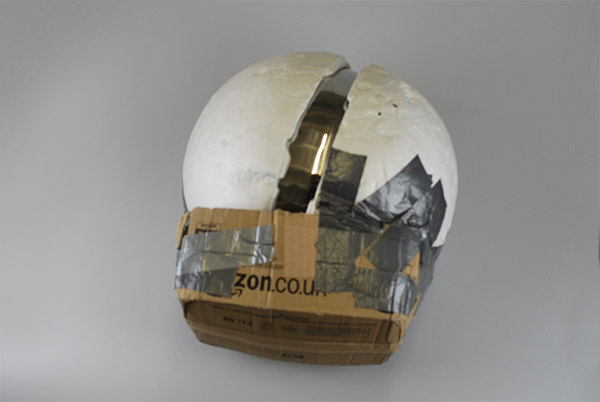
Aluminium sphere
The sphere I used is a garden decoration sphere from Ebay. It´s made of aluminium, has a diameter of 38cm, weights arround 1,1 kg and has a thickness of 1.2mm. Here is one onlineshop where you could find it. Then I simply used an angle grinder to cut a hole of 21cm diameter for the head, another one of 3cm diameter for the camera and a 5,5cm long slot for the monitor cable. When you finished cutting the holes make sure to secure the edges, they can be really sharp (as I needed to learn the hard way…)
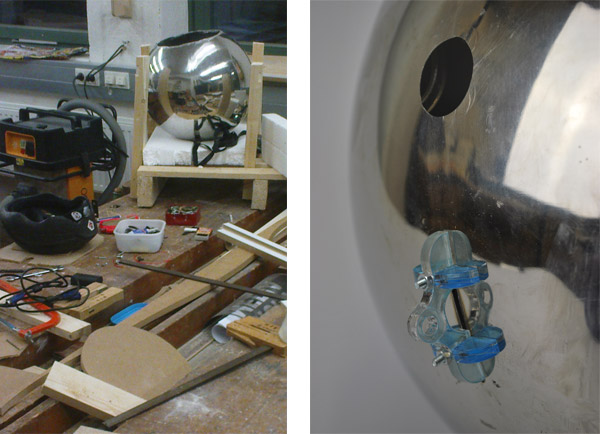
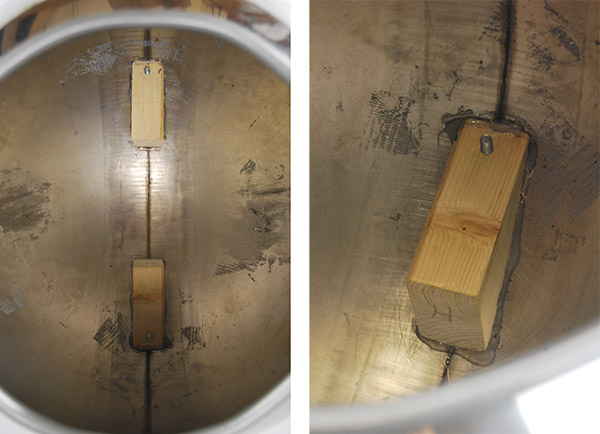
To make it possible to attach anything in the inside of the sphere (without drilling holes in the surface) I used hot glue to fixate two wooden pieces in the inside on which the further mounting later is attached to.
Mounting
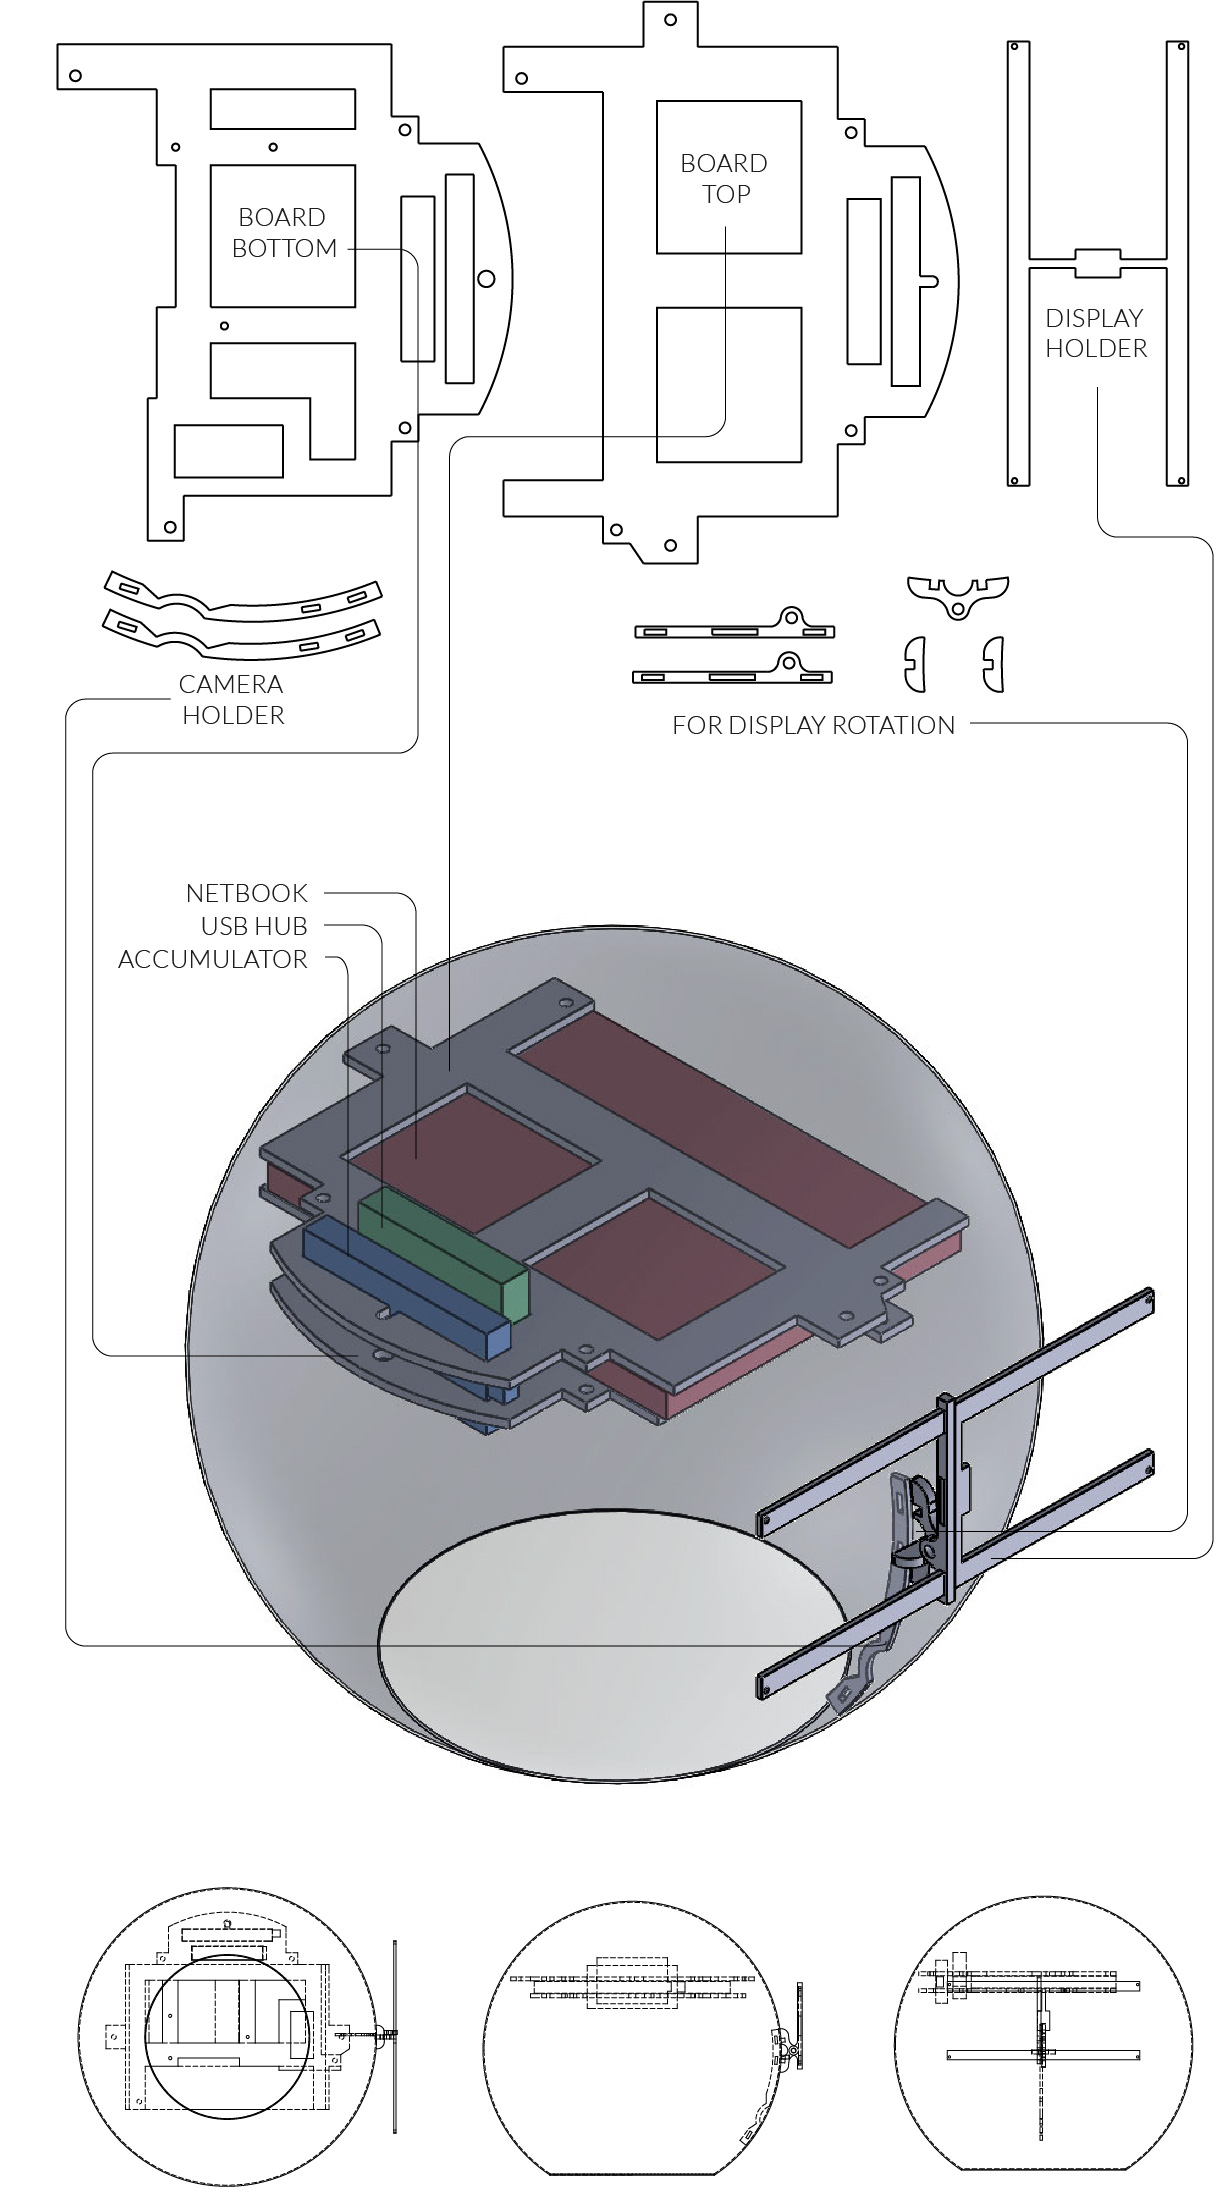
I constructed the mounting in the CAD program SolidWorks and used a lasercutter to cut the pieces out a of 5mm MDF board. You can basically use any material or use the files as a blueprint to cut the pieces by hand if you don´t have acess to an lasercutter.
- Download the CAD Files (as Solidworks file)
- Download the Blueprints as PDF (in correct size)
Assembling
First you need to put the Netbook, the USB hub and the Zeiss Cinemizer accumulator between the two mounting boards and screw them together. Then connect all the cables and attach the plate with the helmet to the rest of the mounting.
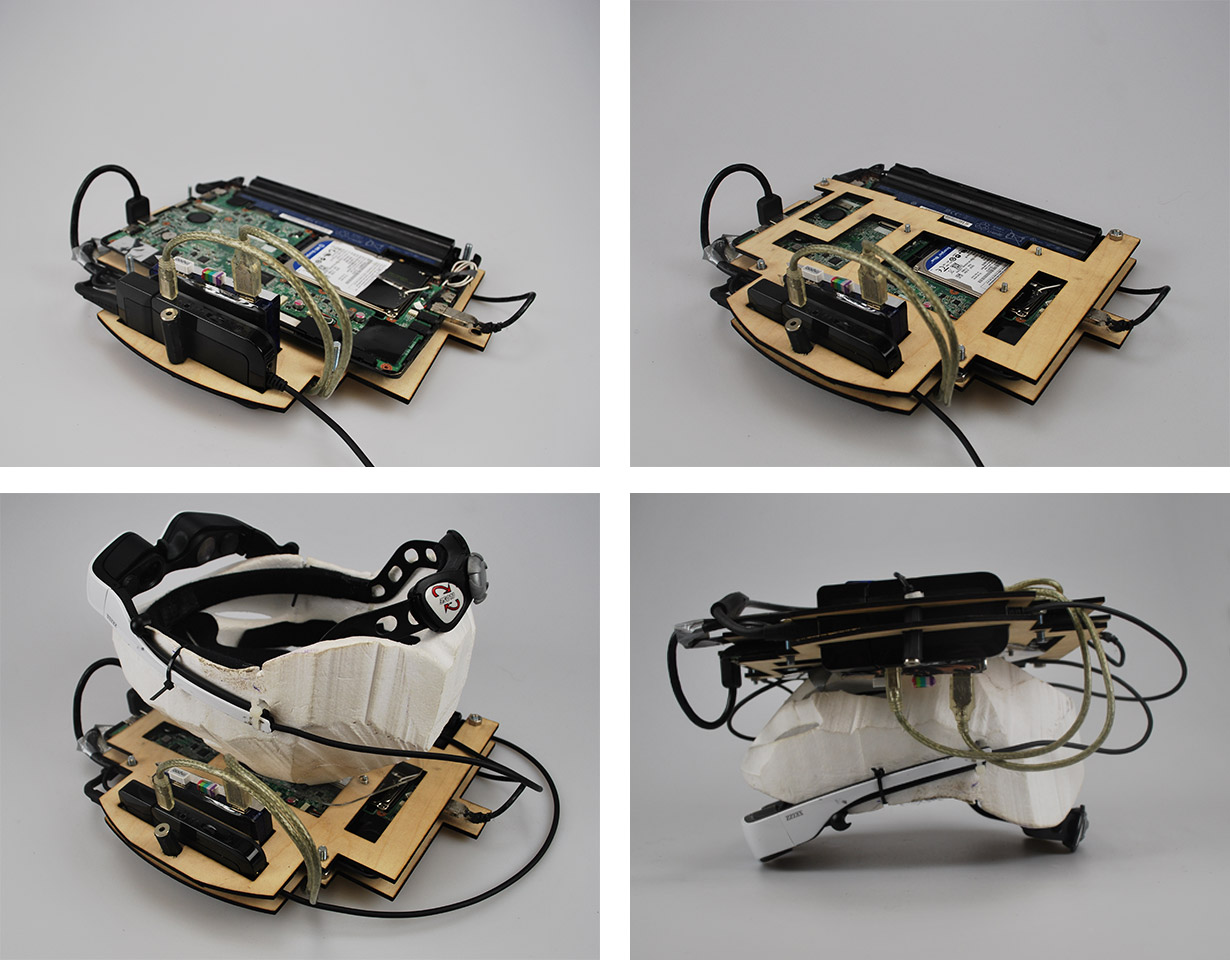
For getting the whole thing inside the sphere you need to remove the helmet again and also detach the battery of the Netbook.
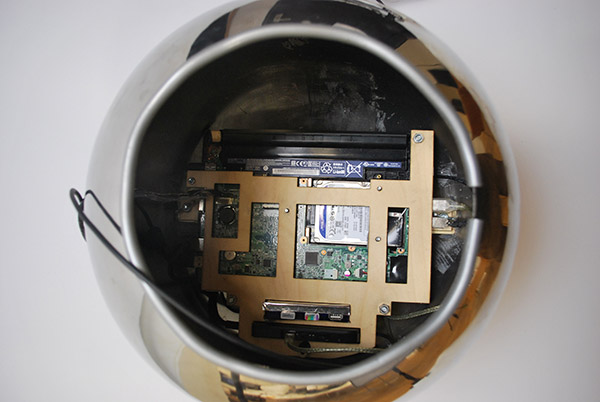
Before you attach the helmet again, now you should plug in the display cable we removed before and stick it through the slot we cutted. Fixate the screen at it`s mounting and attach it to the holder at the outside. Now plug in the cable and fasten the camera from the inside through the hole.
That´s pretty much everything. If anything is unclear (which I´m afraid isn´t avoidable in such a long explanation) please feel free to contact me (lorenzpotthast(AT)gmx(DOT)de).
And if you´re really cool finally you now should build a very professional transport protection (like me), travel arround with the helmet and try it on many different places and occasions =)